How to Film Yourself Alone on Your Phone (2026)
Put the rear camera on a stand at eye level, mark where you will stand, lock focus and exposure on that spot, and start the recording from where you are standing instead of running back to the phone. That is most of it. The rest of this post is the detail: the angles that work, how to check framing when you cannot see the screen, and how to get b-roll of yourself without a second person.
I film almost all of my own videos alone. What wears me down is the walk back to the phone after every take to find out I was out of frame. Most of what follows is about cutting that walk.
What do you need to film yourself?
A way to hold the phone still at the right height. That can be a tripod, a stand, or a stack of books with the phone propped against a mug. Nothing else on this list matters until the phone stops moving.
- A floor tripod that reaches your standing eye level, roughly 1.6 metres for most adults, with a clamp that rotates between vertical and horizontal.
- A tabletop tripod about 15 to 25cm tall for desk shots, hands and details. Most of my b-roll comes off one of these.
- A way to start recording from a distance, covered below. On iPhone you may already own one.
If you are holding the phone yourself for a walking shot, that is a different problem: see how to hold your phone steady while filming.
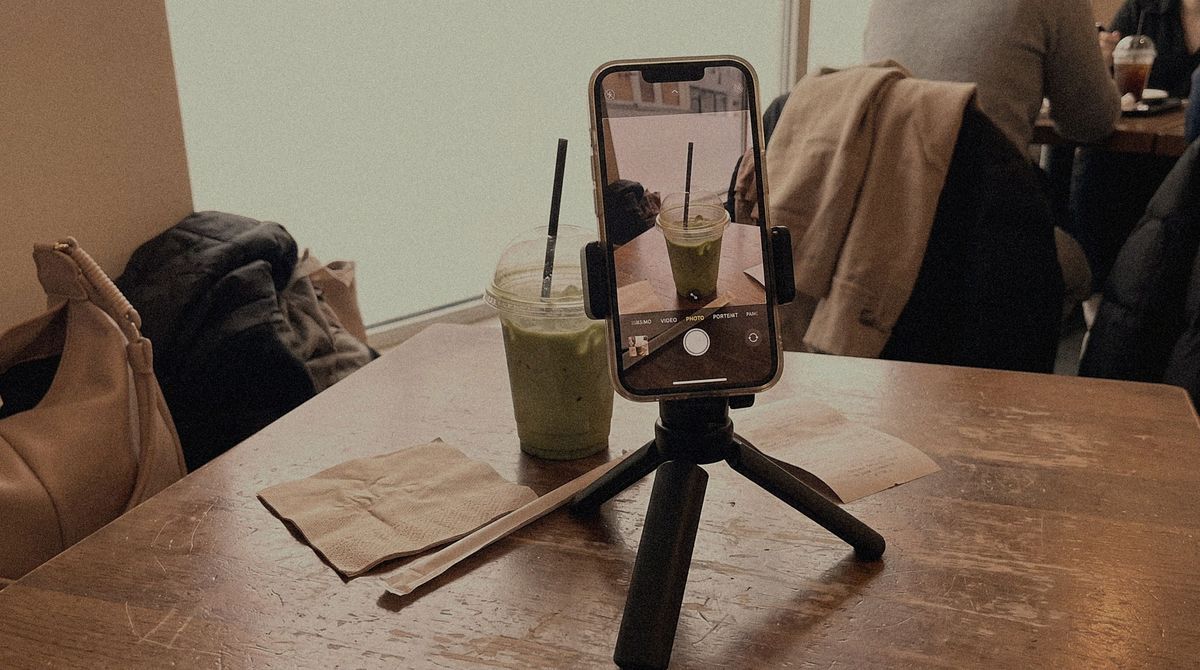
Where should you put the phone?
Lens at your eye level or a few centimetres above, and about 1.5 to 2 metres away for a chest-up shot. Closer than that and a phone's wide lens starts to stretch your nose and forehead. The reasons, and the fix for the webcam look generally, are in how to film a talking head at home.
Use the rear camera when you can. On most phones the rear main camera is the better camera, and the only reason people default to the selfie camera is that they can see themselves. The framing checks below solve that.
Then mark your spot. A small piece of tape on the floor, or a bag at your feet, means every take starts in the same place and the framing you checked stays checked.
What are the best angles to film yourself?
Five angles cover nearly every self-filmed video. Rotate through them and a one-person video stops looking like one long webcam shot.
- Eye level, straight on. For talking to camera. Lens level with your eyes, you looking into the lens.
- Slightly high. Raise the phone 10 to 15 degrees above your eye line and tilt it down. It is the more flattering angle for faces and the one most people mean by "good angle". Do not go higher than that or it reads as a CCTV shot.
- Side profile. Phone at 90 degrees to you, at head height, while you work at a desk, cook or write. You are not looking at the lens, so it reads as a moment rather than a performance.
- Over the shoulder. Phone behind you at shoulder height, pointing past your head at whatever you are doing: a laptop screen, a notebook, a plate. Good for showing work without showing your face.
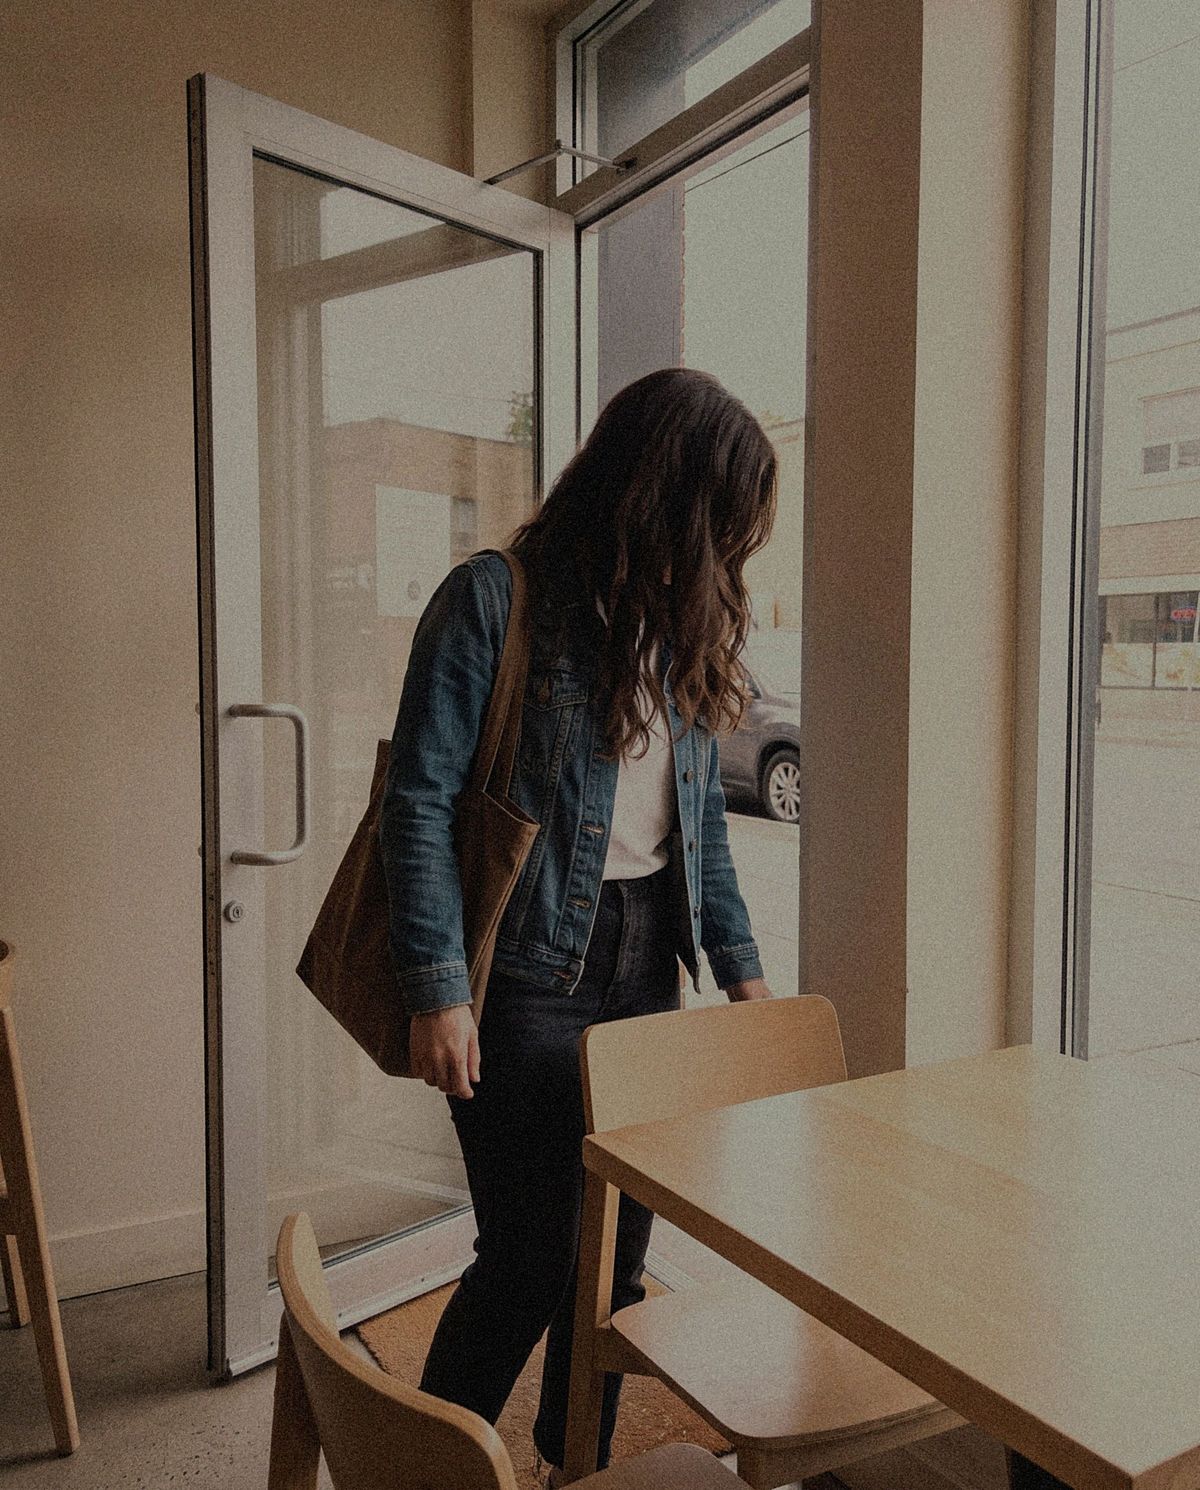
- Low and wide for walk-ins. Phone on the floor or a low table, on the 0.5x ultra-wide, angled slightly up. You walk towards it or past it. The low wide angle exaggerates movement and makes a doorway or a street feel bigger than it is.
The one to avoid: the phone below your chin pointing up. That is the laptop angle, and it is the most recognisable sign of an amateur shot.
How do you check framing when you can't see the screen?
Record a five second test clip, stand on your mark, then walk back and watch it. It is slower than guessing once and much faster than finding out after a ten minute take that the top of your head was cut off.
Four ways to make the check quicker:
- Turn on the grid. On iPhone it is in Settings > Camera, then Grid and Level. Line your eyes up with the upper horizontal line and you can frame the stand-in spot before you step in.
- Use a stand-in. Put a chair, a lamp or a coat stand where your head will be, frame on that, then swap yourself in.
- Use the selfie camera to frame, the rear camera to shoot. Flip to the front camera, stand on your mark, see roughly what the frame covers, then flip back. The two lenses differ, so treat this as a rough check and still record a test clip.
- Use a watch as the viewfinder. Apple's Camera Remote app on Apple Watch shows the iPhone camera's view on your wrist and can start and stop a video, as long as the watch is within Bluetooth range of the iPhone, which Apple puts at about 10 metres (Apple Watch User Guide, checked 4 October 2026).
If the clip needs to work as a vertical TikTok and a wide YouTube video, framing gets harder, because each crop cuts what the other keeps. ContentCam records 9:16 and 16:9 from the same take, so you walk to your mark once and get a full-height vertical file and a full-width wide one. Otherwise, keep yourself in the centre third of the frame.
How do you start recording without running back to the phone?
Start the recording from where you are standing, or start it early and trim the walk off later. Both are fine. The second needs nothing at all.
On iPhone, Apple documents these ways to start and stop a video in the stock Camera app (iPhone User Guide, checked 4 October 2026):
- Either volume button starts and stops a recording in Video mode. Holding either one in Photo mode starts a video too.
- AirPods. On supported AirPods and AirPods Pro models, pressing the stem records a video.
- Apple Watch. In Camera Remote, touch and hold the shutter button until recording begins, then tap Stop.
The camera timer is the other option people reach for, but both guides document it for photos. Apple's iPhone timer offers 3, 5 or 10 seconds, and Google's Pixel timer offers 3 or 10 seconds, with a raised hand starting the countdown on a Pixel 6 or later (Pixel Camera Help, checked 4 October 2026). For video, I find it simpler to just start recording and cut the first few seconds.
How do you lock focus and exposure when you're not in the shot yet?
Lock them on your mark before you step in. If you leave them automatic, the camera focuses on the background while the frame is empty, then hunts and brightens or darkens as you walk in.
On iPhone, tap the spot where you will stand (or your stand-in), then touch and hold until AE/AF Lock appears. Tapping the screen again unlocks it (iPhone User Guide, checked 4 October 2026). Put the stand-in at the same distance as your face, not your chest, so the lock lands on the plane that matters.
White balance drifts for the same reason, and the stock app gives you less control over it. There is more on locking all four settings in manual camera controls for video.
How do you film b-roll of yourself?
Set the phone up first, then perform the shot for it. You are the subject and the crew, so every b-roll shot is a small loop: frame, record, walk in, act, walk out, check.
- Walk-ins. Start on an empty frame, walk in, do the thing, walk out. Leave two seconds of empty frame at each end, because those empty seconds are where an editor cuts.
- Hands and details. Phone on the tabletop tripod, 20 to 30cm from your hands, action in the centre of the frame. Coffee, keyboard, pen on paper, a zip, a pour.
- Feet and floor. Phone on the ground, you walking past or stepping into frame.
- Through something. Film yourself through a doorway or past a plant in the foreground. It gives the shot depth with no extra gear.
Do every action twice: once wide enough to show what is happening, once close on the detail. Ten seconds per take, not three. The b-roll guide covers camera moves and framing for two formats.

How do you get good audio when you're filming yourself?
Get a microphone close to your mouth. At 2 metres the phone's built-in mic hears mostly the room. A clip-on mic about a hand's width below your chin fixes most of it, and the lavalier vs shotgun mic post covers which to buy.
Two habits for solo shoots. Clap once on camera at the start of a take if you record audio on a separate device, so you can line the two up. And for b-roll, do not worry about sound: most b-roll goes under a voiceover or music anyway.
What should you film? A ten-shot list
Ten shots I use for a one-person video. Each is ten seconds, filmed twice.
- Walk-in through a door, low and wide on 0.5x.
- Sitting down, side profile.
- Hands on the main object (cup, laptop, product), tabletop tripod.
- Over the shoulder onto the screen or desk.
- Eye-level piece to camera, the main talking shot.
- The same piece from slightly high, for a cut in the middle.
- A close detail of the thing you are talking about.
- Looking out a window or away from camera, side profile.
- Feet walking, phone on the ground.
- Walk-out, leaving an empty frame for two seconds.
Group them by where the phone sits, not by the order of the video. All the tabletop shots, then all the floor shots, then the tripod. You move the phone four times instead of ten. For filming a whole week this way, see how to batch film a week of content.
Common questions
What are the best angles to film yourself? Eye level for talking, about 10 to 15 degrees above your eyes for a more flattering face, side profile for working shots, over the shoulder for screens and desks, and low on 0.5x for walk-ins. Avoid the phone below your chin pointing up.
What is the best way to film yourself on iPhone? Rear camera on a stand at eye level, grid on in Settings > Camera, focus and exposure locked with a touch and hold until AE/AF Lock appears, and the recording started with a volume button, an AirPods stem press on supported models, or the Apple Watch Camera Remote.
What is the best tripod to film yourself? One that reaches your standing eye level, roughly 1.6 metres for most adults, with a clamp that rotates between vertical and horizontal. Add a small tabletop tripod for desk and detail shots. Height and a steady clamp matter more than the brand.
How do you film b-roll of yourself? Set the phone up first and walk into the shot. Start on an empty frame, walk in, do the action, walk out, and leave two seconds of empty frame at each end.
How should you light yourself when filming alone? Face a window, or turn about 45 degrees off it, and switch the ceiling light off. Never put the window behind you. No window? See lighting a video with no windows.
How do you film yourself without feeling awkward? Record more than you need. Start rolling before you are ready, do every action twice, and treat the first take as a rehearsal. Most of the awkwardness comes from trying to nail it in one go with the record light on.
Try ContentCam free. Walk to your mark once and get a vertical and a wide file from the same take. No watermark, iPhone and Android.


Related: filming a talking head at home · holding your phone steady · b-roll that works vertical and wide · reading a script naturally